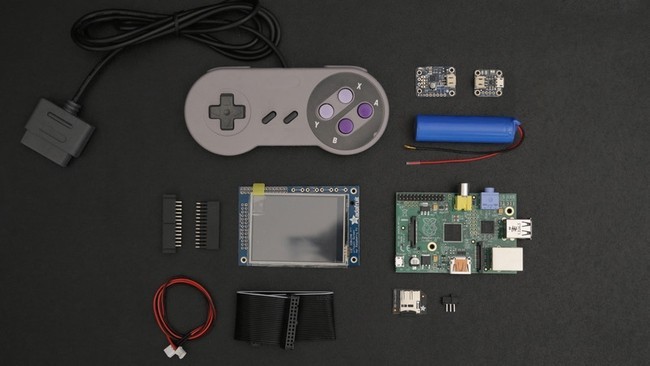
To celebrate the 25th anniversary of the Nintendo GameBoy, Popular DIY instructional website, Adafruit, is showing you how to build your own Raspberry Pi Based gaming device. Adafruit published the full instructions, schematics, and parts needed to bring the 80′s gaming device to life. You need quite a bit of experience working with Raspberry Pi, and a 3D printer to print Adafruit’s print files for the portable case. The buttons could be 3D printed too, but if you have an old Super Nintendo controller, then you can save yourself some 3D printing time.
The DIY Nintendo GameBoy can be programmed to play any emulator game, including the original GameBoy unit games, such as Tetris, Paperboy, Super Mario Land, Double Dragon, and more.
Parts needed to assemble the Adafruit version of the Nintendo Gameboy:
- Raspberry Pi Model B
- SNES Controller
- 2200mAh lithium cylindrical battery
- PiTFT Mini Kit
- GPIO Pi Cable
- PowerBoost 500
- Micro Lipo Charger
List of equipment needed to pull this off:
- 3D Printer
- Wire Strippers
- Panavise Jr.
- Heat Shrink Pack
- Fun-Tac, Putty
- Soldering Iron + Solder
- Third-helping hand
So if you have some spare time, why not add this to your to-do list, you can get all the parts need for this project from Adafruit, see the source link below.
VIA: 3DPrint
SOURCE: Adafruit


